I often forget this command to examine what has been logged by the PF filter.
$ tcpdump -n -e -ttt -r /var/log/pflog
To look at what is being filtered in real-time use the following command instead:
$ tcpdump -n -e -ttt -i pflog0
I often forget this command to examine what has been logged by the PF filter.
$ tcpdump -n -e -ttt -r /var/log/pflog
To look at what is being filtered in real-time use the following command instead:
$ tcpdump -n -e -ttt -i pflog0
I have three old Netgear GSM 7224 Ethernet switches that I use from time to time in my lab network. These switches run at 1Gbps on each port which is still plenty fast enough for my needs.
I purchased them second hand on eBay some years ago. Soon after my acquisition, I replaced the 40mm fans in two of them and upgraded the firmware. All of my GSM7224 switches now needed new fans. One had stopped altogether, while the others had become very noisy.
Having done this repair before, this time around, I carefully selected replacement fans with the correct 2-pin plug already installed. I had to cut the plugs off the old fans last time and soldered them to the replacements. Lesson learned. With the new fans I could have glued M3 nuts into the receptacles but I prefer to use brass inserts like the OEM fans for ease of installation and avoid the glue.
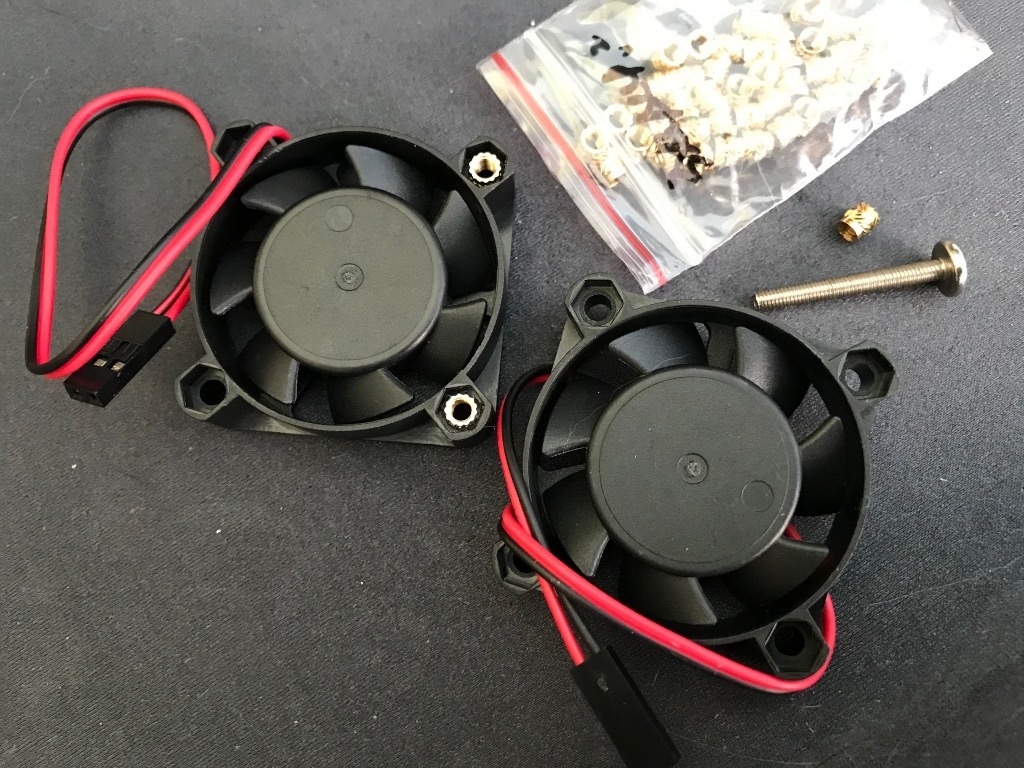
Six economically priced 5Vdc 40x40x10mm fans were purchased on eBay for £2.85 each, plus a bag of 50 M3 brass inserts for £2.19. The total cost of this repair was £19.29 in October 2024.
So why did I buy no name fans? A single Noctua fan costs £20, six of them would have set me back £120. I couldn’t justify spending an extra £100 on repairing these old switches. I would have to repair them five more times with cheap fans before breaking even on the cost of Noctua fans. If the switches were going to be used in a 24×7 production network, then better quality fans would make more sense. These switches are for a development lab and only powered on when needed.
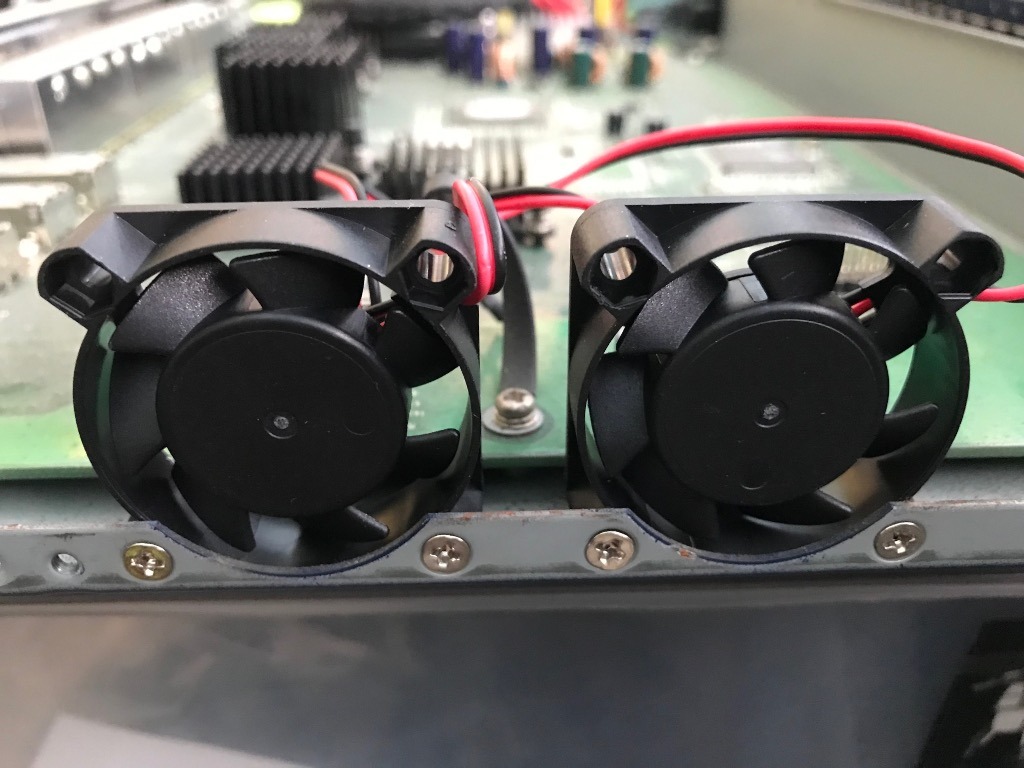
I compared the fans on the switch that still had it’s original fans to those that I had repaired previously. All of the fans were installed the same way, sucking air out of the case. I have always been doubtful of the manufacturer’s choice to install them this way, so I decided to install the replacement fans blowing air onto the heatsinks instead. I am hoping that this will keep the case temperatures lower and make the fans last longer.
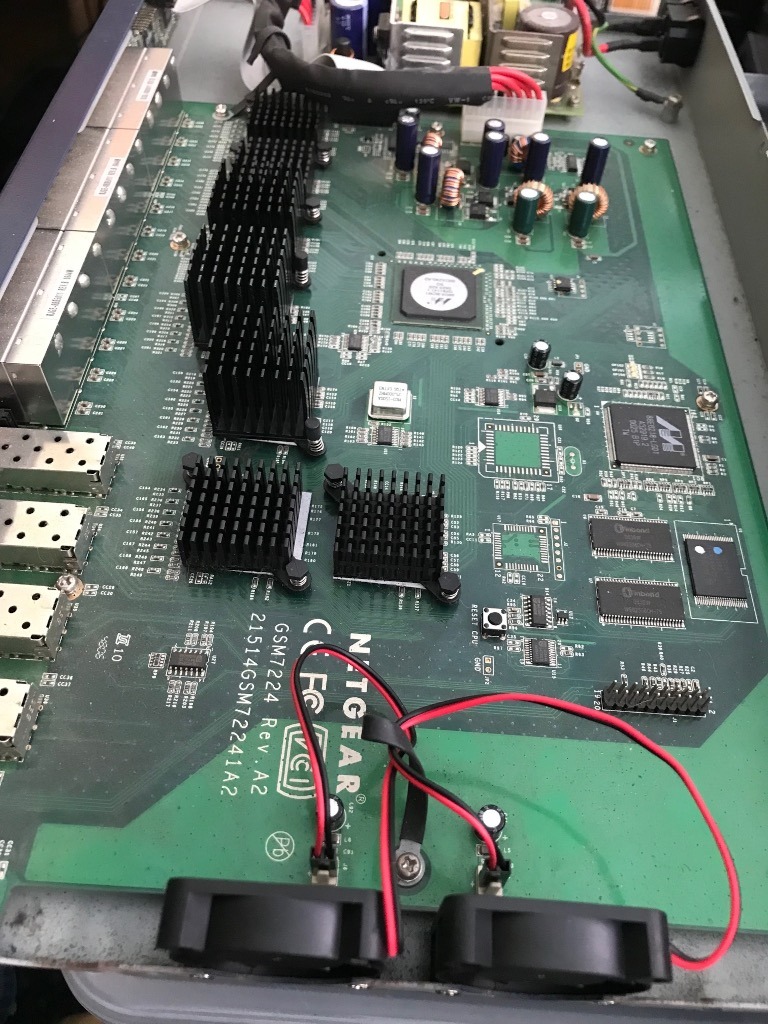
The new fans have all been installed and are still quiet. Only time will tell if I should have bought Noctua fans. So far, I am happy with my cheap repair.
The next project for these switches is to replace the awful configuration web app and equally awful text mode configuration. The older FSM726 switch had an easy to use terminal interface for setup. I still have a couple of them and it is far quicker to set one of these up over a serial terminal.
I am considering setting up a bastion host with SSH2 access over Ethernet and RS232C serial to the switch console port. I could create my own text mode interface that mimics the FSM726 which runs the appropriate sequence of commands on the switch to make the required changes. Alternatively, this could be a web app or an Ansible module. My Ansible controller could become the bastion host with the addition of a few more serial ports.
I am not entirely certain what the cause of this error is but it is particularly annoying when it happens on a headless system.
I think that the problem is caused by too many keys to choose from during key negotiation, or no key at all. I found this workaround.
ssh -o PubkeyAuthentication=no vince@host
Once a successful login with a password is possible, logout and copy the authentication key to the host…
ssh-copy-id -o PubkeyAuthentication=no vince@host
Then login with ssh again…
ssh vince@host
And ssh should authenticate without using a password.
I use of a lot of old kit in my lab. Some of these machines have very poor ACPI implementations and they often complete their boot displaying an 80×25 character console on monitors that can support much higher resolutions. I have put up with staggered ZFS listings for too long and decided to fix this problem on my FreeBSD hosts.
Modern FreeBSD uses the VT console by default. If a video graphics driver has been installed, it will display a console in a higher resolution if configured.
The configuration below was tested on FreeBSD 13.4-RELEASE-p1 and FreeBSD 14.1-RELEASE-p5 with onboard intel graphics adapter.
Install the graphics driver:
$ sudo pkg install drm-kmod
Run the following command to load the intel graphics driver on boot:
$ sysrc kld_list+=i915kms
Edit /boot/loader.conf adding the following lines to the file:
# VT console
hw.vga.textmode=1
hw.vga.acpi_ignore_no_vga=1
kern.vty=vt
kern.vt.fb.default_mode="1024x768"
If dmesg reports a good ACPI table, you don’t need to use hw.vga.acpi_ignore_no_vga=1 .
If you are using a screen that cannot display 1024×768, use kern.vt.fb.default_mode=”800×600″ instead.
Reboot the host to see the new console settings are active.
To make a USB serial adapter visible to FreeBSD, add the following to /boot/loader.conf
# USB serial adapter
ucom_load="YES"
This is super easy, just press the ‘Windows’ key (flag) and the ‘Full Stop’ key (.) on your keyboard at the same time to pop-up the emoji selector.
After all these years, I just found this feature! It was mentioned in a VSCode YouTube tutorial that I watched yesterday.
Assuming that your Django container is already running under Docker, find out what it’s ‘Container ID’ is.
$ docker ps
CONTAINER ID IMAGE ...
fb3aabc8e123 django-web ...
In the above example the Container ID is fb3aabc8e123.
Now you can easily execute commands inside that container.
$ docker exec -it fb3aabc8e123 sh
The ‘-it’ option executes the command in an Interactive Terminal.
The ‘sh’ at the end of the command is the program to run, in this case it the system shell program. You could use ‘bash’ on a Linux machine if that’s your preference.
Now that you have a shell running in the Django container, you can run the command to create the admin user account.
# python ./manage.py createsuperuser
The easiest way to have Django run a migration inside a Docker container is to get Docker to run a new container to perform the task.
Using ‘run’ instead of ‘exec’ works if there is a start-up script like entrypoint.sh that prevents the container from starting until the migration has been completed (egg-chicken-egg).
E.g. I have a Django app called ‘web’ defined in docker-compose.yml , my terminal’s current working directory is the Django container folder where manage.py is resident.
$ docker compose run web ./manage.py migrate
This probably works similarly with Podman, I just haven’t tried it yet to verify.
I noticed today that the FreeBSD ZFS pool that I created on my laptop SSD was not configured for TRIM. TRIM enables the SSD to recover space from previously written to blocks that have since had files deleted. This can help maintain performance of the SSD as it fills with data.
My pool is called zroot, so the command to check the value of the TRIM setting is:
$ zpool get autotrim zroot
The command to switch on automatic TRIM is:
$ zpool set autotrim=on zroot
Originally written in 2018. This post was languishing in drafts for a couple of years. I may complete it someday.
I acquired three old Netgear GSM7224 switches for my lab network some time ago and I pulled them off the shelf recently to use in a project I am currently working on. I wish I had actually checked them out fully when I first acquired them because it has cost me a week or so in time to get them useable in a reasonably secure test network. I did not anticipate the problems getting older high-end Netgear products to work securely in a network environment with up to date patched hosts.
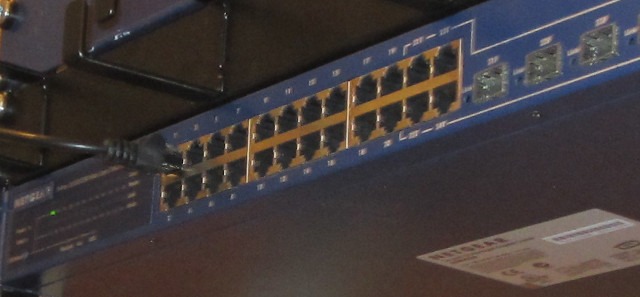
If you are trying to make use of ageing Netgear GSM7224 Gigabit Ethernet Managed Switches you may find this article useful. Some of this may even be relevant to other network equipment running similar firmware Eg. Sun Netra.
I spent a little time getting familiar with one of the switches on my bench. I used a laptop running Ubuntu 18.04 with a USB Serial adapter and a 9-pin null modem serial cable connected to the switch’s console port on the front panel. As these were second hand switches I didn’t have knowledge of the existing admin password. Resetting the password was at the top of the task list but until then it was time to do some basic surveilance on the switch using nmap. These are my initial observations.
All three of my switches had noisy fans. Each has two 40x40x10mm 5VDC 2-pin fans inside and one in each had partially seized which was causing a lot of noise.
Opening the case was just a bit of screwdriver work to remove the rack mounting ears and then the screws holding the case together. All of the externally visible screws have to be removed to open the case. The cover slides off rearwards with a slight upward tilt. Once inside I could see the fans that need replacing.
I opted for cheap replacement fans sourced from eBay but I probably should have put more thought into that decision at the time. Within a few months the replacement fans started getting noisy.
I wish I had documented the fan replacement fully as I am going to use one of these switches again in November 2024. I originally installed brass inserts into the plastic housings of the 40mm fans to enable them to attached with screws to the chassis. I am guessing that the inserts are M3 thread and approximately 4mm deep. I have ordered some more for another set of new fans.
I connected a 9-pin null modem serial cable that I use for console access to the switch and to a USB serial adapter plugged into my laptop.
I use Minicom as a terminal emulator to access my switch consoles. Ctrl-A in Minicom gains access to its configuration menu. The connection was configured for /dev/ttyUSB0 at 9600,n,8,1. After saving the settings the switch console login prompt appeared.
My Netgear switches were all purchased used without documentation or being reset to factory defaults. I tried logging in as admin with various popular passwords without luck. Fortunately, rebooting the switches with Minicom still connected and running reveals a boot menu. Select option 2 to access a configuration menu. From here the switch can be reset to factory defaults without needing a password.
I downloaded the ‘latest’ firmware from Netgear and setup a TFTP server on my laptop to serve the new firmware image. The firmware’s README describes the process to upgrade and although it takes a while silently updating there is eventually some confirmation on screen and the job is done.
I was having problem getting the SNTP client to synchronise time with the NTP servers that I had specified to use. That was until I tried this configuration command that worked…
(GSM7224) (config)# sntp client mode unicast
I also had some problems getting recent SSH clients to work. PuTTY on a Windows machine was useful as is still support SSH v1.
Port scanning the switch revealed that tcp 4242 appears to be used by the switch’s Java client interface. As I am not using the Java client it can be closed using:
no ip http java
More to follow…