Originally written in 2018. This post has been languishing in drafts for a couple of years. I may complete it someday.
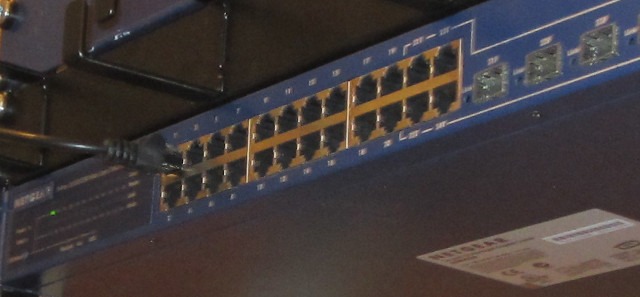
I acquired three old Netgear GSM7224 switches for my lab network some time ago and I pulled them off the shelf recently to use in a project I am currently working on. I wish I had actually checked them out fully when I first acquired them because it has cost me a week or so in time to get them useable in a reasonably secure test network. I did not anticipate the problems getting older high-end Netgear products to work securely in a network environment with up to date patched hosts.
If you are trying to make use of ageing Netgear GSM7224 Gigabit Ethernet Managed Switches you may find this article useful. Some of this may even be relevant to other network equipment running similar firmware Eg. Sun Netra.
Observations
I spent a little time getting familiar with one of the switches on my bench. I used a laptop running Ubuntu 18.04 with a USB Serial adapter and a 9-pin null modem serial cable connected to the switch’s console port on the front panel. As these were second hand switches I didn’t have knowledge of the existing admin password. Resetting the password was at the top of the task list but until then it was time to do some basic surveilance on the switch using nmap. These are my initial observations.
- Noisy or failed fans
- Slow start-up time
- Old firmware. The latest 2007 version is still available for download
- Log files are time and dated from 1 Jan 1970 at start-up
- Awful Netgear documentation, lots of critical configuration information undocumented
- Telnet running on tcp 23
- No SSH v2 access
- Unencrypted web management interface on tcp 80
- No HTTPS for web interface
- Mysterious tcp 4242 port listening
- Web Management prompts for Java plugin but 2018 browsers are not able to run Java applets
Objectives
- Reset passwords on all switch login accounts
- Replace fans with new parts
- Document out of band command line management via the serial console
- Upgrade firmware to latest version
- Fix the time stamps in the log files
- Fix the Java plugin requirement
- Configure in-band management only from the management VLAN 1 with no internet access
- Enable SSH v1 safely via a bastion host running SSH v2
- Enable HTTPS web interface only over management VLAN
- Disable less secure management interfaces, telnet and unencrypted web management
- Enable remote syslog
- Enable SNMP
Tools and Equipment Required
- Netgear GSM7224
- The latest firmware for the switch. At the time of writing this was 6.2.0.14
- Laptop or desktop computer that has a terminal emulator.
- Oracle VirtualBox to host an old distro that has an SSH v1 client or a Windows PC with PuTTY.
- CD-ROM or ISO image file for an old 32-bit Linux or FreeBSD distribution that was released between 2006 and 2007. This is primarily for using OpenSSL and OpenSSH from this period to fully configure the switch. I used Ubuntu 6.06 LTS x86 as this was still downloadable in 2018
- 9-pin serial null modem cable.
- USB to Serial adapter if your computer does not have a native serial port.
- VT100 terminal emulation program that can connect to the switch’s console session via your serial connection. I used Minicom that was installable from the Ubuntu repos.
- Netgear GSM7224 Administrators Guide
- Netgear GSM7224 Command Line Reference
- nmap or zenmap (GUI version) for testing
Optional Requirements
- A compatible Java Plugin for a web browser that shipped with your 2006 Linux distro. If you want to try the Java applet function in the switch’s web interface
- Wireshark if you want or need to decode further the SSH protocol between your switch and ssh clients
Replace the Noisy Fans
All three of my switches had noisy fans. Each has two 40x40x10mm 5VDC 2-pin fans inside and one in each had partially seized which was causing a lot of noise.
Opening the case was just a bit of screwdriver work to remove the rack mounting ears and then the screws holding the case together. All of the externally visible screws have to be removed to open the case. The cover slides of rearwards with a slight upward tilt. Once inside I could see the fans that need replacing.
I opted for cheap replacement fans sourced from eBay but I probably should have put more thought into that decision at the time. Within a few months the replacement fans started getting noisy.
Gain Console Access
I connected a 9-pin null modem serial cable that I use for console access to the switch and to a USB serial adapter plugged into my laptop.
I use Minicom as a terminal emulator to access my switch consoles. Ctrl-A in Minicom gains access to its configuration menu. The connection was configured for /dev/ttyUSB0 at 9600,n,8,1. After saving the settings the switch console login prompt appeared.
My Netgear switches were all purchased used without documentation or being reset to factory defaults. I tried logging in as admin with various popular passwords without luck. Fortunately, rebooting the switches with Minicom still connected and running reveals a boot menu. Select option 2 to access a configuration menu. From here the switch can be reset to factory defaults without needing a password.
Update Firmware
I downloaded the ‘latest’ firmware from Netgear and setup a TFTP server on my laptop to serve the new firmware image. The firmware’s README describes the process to upgrade and although it takes a while silently updating there is eventually some confirmation on screen and the job is done.
I was having problem getting the SNTP client to synchronise time with the NTP servers that I had specified to use. That was until I tried this configuration command that worked…
(GSM7224) (config)# sntp client mode unicast
I also had some problems getting recent SSH clients to work. PuTTY on a Windows machine was useful as is still support SSH v1.
Port scanning the switch revealed that tcp 4242 appears to be used by the switch’s Java client interface. As I am not using the Java client it can be closed using:
no ip http java
More to follow…