Categories
FreeBSD iocage

Migrate a thick jail to another host

Migrating a jail

Thick iocage jails can be safely migrated between FreeBSD hosts using ZFS Send/Recv over SSH.

In the following example:

  • src$ is the original host
  • dst$ is the destination host
  • ‘myapp’ is the name of my jail to migrate
  • Everything is done with root privileges

Stopping processes

Stop the jail and any other ZFS replication processes.

src$ iocage stop myapp

src$ service zrepl stop

dst$ service zrepl stop

Create a snapshot

src$ zfs snapshot -r zroot/iocage/jails/myapp@migration

Send the snapshot

src$ zfs send -R zroot/iocage/jails/myapp@migration | ssh root@dst 'zfs recv -F -v zroot/iocage/jails/myapp'

Testing

Check that the jail exists and that it can be started.

dst$ iocage list

dst$ iocage start myapp

Categories
FreeBSD iocage

Convert a ‘thin’ iocage jail to ‘thick’

I have been using iocage for a number of years as the tool to manage my FreeBSD jails. There are two types of iocage jail installations that I use, thin jails (clone jails) and thick jails.

To create your first jail, you have to fetch a FreeBSD operating system release installation using ‘iocage fetch’. This is used in both types of jails and is separate from the host’s own operating system.

Thin jails share the ZFS dataset that contains the working copy of a fetched version of FreeBSD. They save a lot of space as upgrading FreeBSD one thin jail, upgrades them all.

Thick jails have their own independent copy of the chosen fetched FreeBSD. They use more disk space and take more time to upgrade as each must be done individually.

The extra time and disk space used by Thick jails are worth it. Moving jails between hosts, performing backups and restores using ZFS Send and Receive are a significant advantage.

The requirement

I needed to migrate a thin jail from one host to another but at the destination I wanted it to run as a thick jail instead. As I have found that thick jails are better for me when it comes to upgrades. The migration of a thin jail cannot be done using ZFS Send/Recv as is.

How to do it

Create a new thick jail using iocage called ‘thickjail’.

$ iocage create -T -r 14.3-RELEASE -n thickjail dhcp=on

Check that the new thick jail works by starting and stopping it.

$ iocage start thickjail

$ iocage stop thickjail

$ iocage stop myapp

Copy the files from the thin jail to the thick jail using rsync. Make sure both jails have been stopped beforehand!

$ rsync -a /zroot/iocage/jails/myapp/ /zroot/iocage/jails/thickjail/

When this completes you will notice two jails with the same name when you use ‘iocage list’. However, if you look at the ZFS datasets they will be correctly named.

To correct the listing in iocage, do the the following:

$ iocage rename myapp thinjail

$ iocage rename thickjail myapp

$ iocage start myapp

Test that the new thick jail ‘mayapp’ is working OK before deleting the old thin jail.

$ iocage list

$ iocage destroy thinjail

Categories
WordPress

WordPress: Find out what files are using your storage

I recently hit the quota limit on a WordPress site. I found a plug-in that works similarly to the GNOME Disk Usage Analyzer (baobab) that I have been using for many years.

The WordPress plug-in is called ‘Disk Usage Sunburst‘, it makes it very easy to quickly find large files within your WordPress system.

Categories
FreeBSD

PF: Read the log

I often forget this command to examine what has been logged by the PF filter.

$ tcpdump -n -e -ttt -r /var/log/pflog

To look at what is being filtered in real-time use the following command instead:

$ tcpdump -n -e -ttt -i pflog0

Categories
Hardware

Replacement fans for GSM7224 switches

I have three old Netgear GSM 7224 Ethernet switches that I use from time to time in my lab network. These switches run at 1Gbps on each port which is still plenty fast enough for my needs.

I purchased them second hand on eBay some years ago. Soon after my acquisition, I replaced the 40mm fans in two of them and upgraded the firmware. All of my GSM7224 switches now needed new fans. One had stopped altogether, while the others had become very noisy.

Having done this repair before, this time around, I carefully selected replacement fans with the correct 2-pin plug already installed. I had to cut the plugs off the old fans last time and soldered them to the replacements. Lesson learned. With the new fans I could have glued M3 nuts into the receptacles but I prefer to use brass inserts like the OEM fans for ease of installation and avoid the glue.
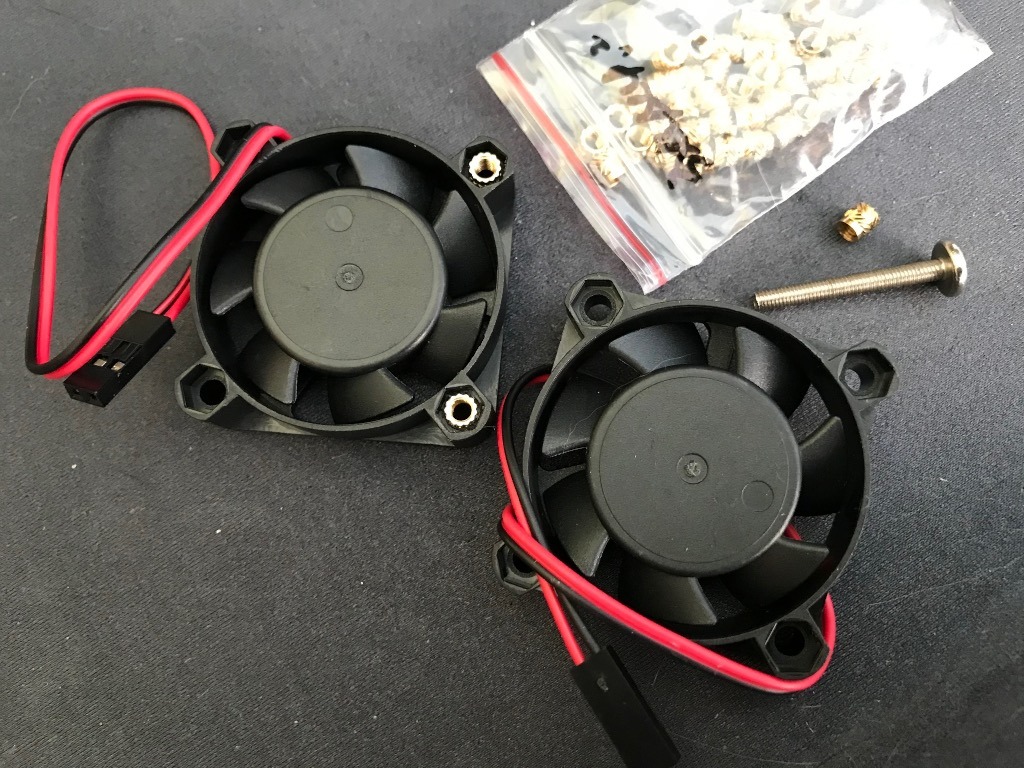
Brass inserts for replacement fans

Six economically priced 5Vdc 40x40x10mm fans were purchased on eBay for £2.85 each, plus a bag of 50 M3 brass inserts for £2.19. The total cost of this repair was £19.29 in October 2024.

So why did I buy no name fans? A single Noctua fan costs £20, six of them would have set me back £120. I couldn’t justify spending an extra £100 on repairing these old switches. I would have to repair them five more times with cheap fans before breaking even on the cost of Noctua fans. If the switches were going to be used in a 24×7 production network, then better quality fans would make more sense. These switches are for a development lab and only powered on when needed.

Modification

I compared the fans on the switch that still had it’s original fans to those that I had repaired previously. All of the fans were installed the same way, sucking air out of the case. I have always been doubtful of the manufacturer’s choice to install them this way, so I decided to install the replacement fans blowing air onto the heatsinks instead. I am hoping that this will keep the case temperatures lower and make the fans last longer.
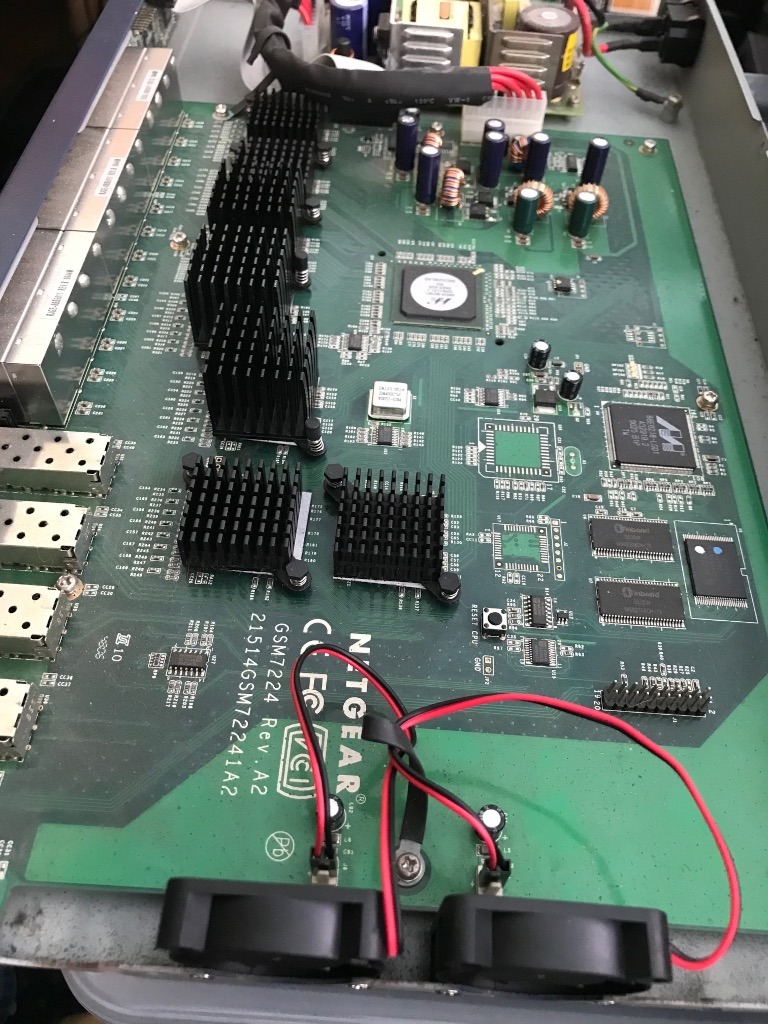
The heatsinks are in the air flow of the fans

The new fans have all been installed and are still quiet. Only time will tell if I should have bought Noctua fans. So far, I am happy with my cheap repair.
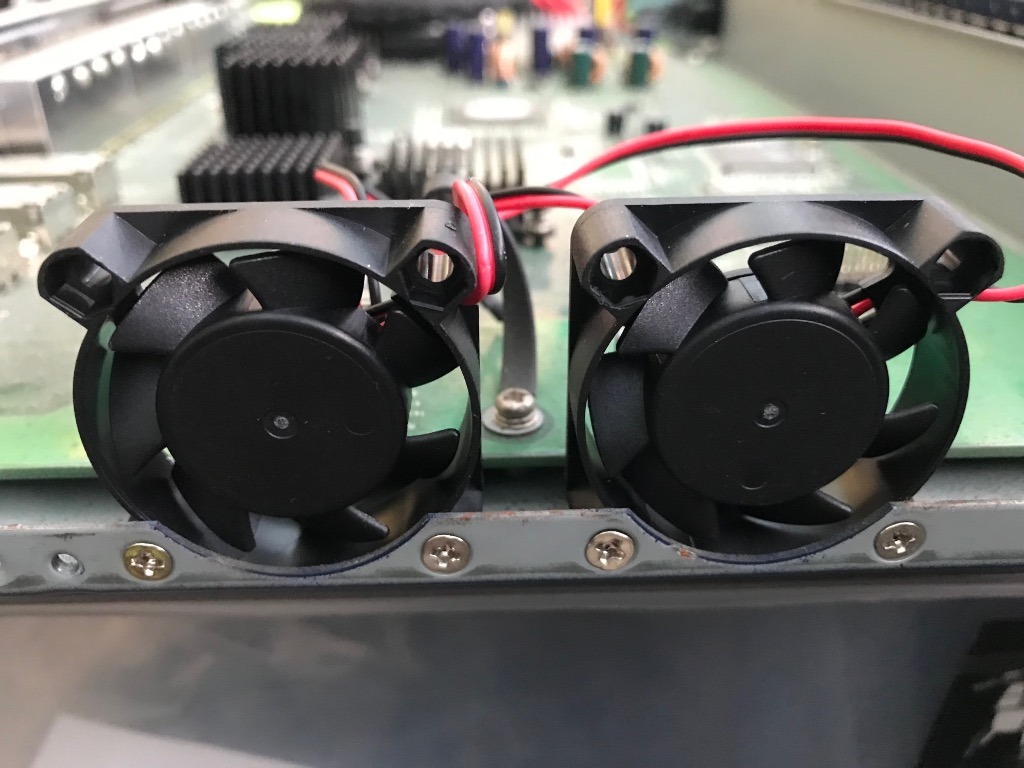
Replacement fans installed

A Future Project

The next project for these switches is to replace the awful configuration web app and equally awful text mode configuration. The older FSM726 switch had an easy to use terminal interface for setup. I still have a couple of them and it is far quicker to set one of these up over a serial terminal.

I am considering setting up a bastion host with SSH2 access over Ethernet and RS232C serial to the switch console port. I could create my own text mode interface that mimics the FSM726 which runs the appropriate sequence of commands on the switch to make the required changes. Alternatively, this could be a web app or an Ansible module. My Ansible controller could become the bastion host with the addition of a few more serial ports.

Update September 2025

All of my Netgear 7224 switches were scrapped this summer and replaced with Netgear GS108Tv2 switches.

The 7224 switches had been setup on a bench for a project one evening, but I couldn’t get back to completing it for some time. What I had not realised was that they were in direct sunlight on the hottest days of the year and in a room with the windows and doors shut.

When I got back to the project I was having a lot of weird problems in data transmission, including using the serial interfaces. Slipping the cases off revealed that almost all of the electrolytic capacitors were showing signs of failure with the tops bulging. As newer switches use a lot less power, I decided to buy some used GS108Tv2 switches to replace them instead of replacing the capacitors in the 7224s.

I stripped out the new fans, separated the PCBs from the cases and dropped the parts off at our local recycling. Sometimes you just have to let go of old kit.

Categories
FreeBSD Linux Windows

SSH: too many authentication failures

I am not entirely certain what the cause of this error is but it is particularly annoying when it happens on a headless system.

I think that the problem is caused by too many keys to choose from during key negotiation, or no key at all. I found this workaround.

ssh -o PubkeyAuthentication=no vince@host

Once a successful login with a password is possible, logout and copy the authentication key to the host…

ssh-copy-id -o PubkeyAuthentication=no vince@host

Then login with ssh again…

ssh vince@host

And ssh should authenticate without using a password.

Categories
FreeBSD Hardware

1024×768 FreeBSD VT Console

I use of a lot of old kit in my lab. Some of these machines have very poor ACPI implementations and they often complete their boot displaying an 80×25 character console on monitors that can support much higher resolutions. I have put up with staggered ZFS listings for too long and decided to fix this problem on my FreeBSD hosts.

Modern FreeBSD uses the VT console by default. If a video graphics driver has been installed, it will display a console in a higher resolution if configured.

The configuration below was tested on FreeBSD 13.4-RELEASE-p1 and FreeBSD 14.1-RELEASE-p5 with onboard intel graphics adapter.

Install the graphics driver:

$ sudo pkg install drm-kmod

Run the following command to load the intel graphics driver on boot:

$ sysrc kld_list+=i915kms

Edit /boot/loader.conf adding the following lines to the file:

# VT console
hw.vga.textmode=1
hw.vga.acpi_ignore_no_vga=1
kern.vty=vt
kern.vt.fb.default_mode="1024x768"

If dmesg reports a good ACPI table, you don’t need to use hw.vga.acpi_ignore_no_vga=1 .

If you are using a screen that cannot display 1024×768, use kern.vt.fb.default_mode=”800×600″ instead.

Reboot the host to see the new console settings are active.

Categories
FreeBSD Hardware

USB Serial Adapter on FreeBSD

To make a USB serial adapter visible to FreeBSD, add the following to /boot/loader.conf

# USB serial adapter
ucom_load="YES"


Categories
Microsoft Windows

How to use emojis on Microsoft Windows

This is super easy, just press the ‘Windows’ key (flag) and the ‘Full Stop’ key (.) on your keyboard at the same time to pop-up the emoji selector.

After all these years, I just found this feature! It was mentioned in a VSCode YouTube tutorial that I watched yesterday.

Categories
Containerisation Django Docker Python

Create a Django admin account inside a Docker container

Assuming that your Django container is already running under Docker, find out what it’s ‘Container ID’ is.

$ docker ps
CONTAINER ID IMAGE ...
fb3aabc8e123 django-web ...

In the above example the Container ID is fb3aabc8e123.

Now you can easily execute commands inside that container.

$ docker exec -it fb3aabc8e123 sh

The ‘-it’ option executes the command in an Interactive Terminal.

The ‘sh’ at the end of the command is the program to run, in this case it the system shell program. You could use ‘bash’ on a Linux machine if that’s your preference.

Now that you have a shell running in the Django container, you can run the command to create the admin user account.

# python ./manage.py createsuperuser